
A boltless rack goes together in four moves, with no tools, no fixings and nothing drilled into a wall. There are only three kinds of part in the box, and once you have seen how one beam locks into one upright you have learned the entire assembly — everything after that is the same action repeated.
This guide is the order to do it in, with a photograph of each stage. Allow 15 to 20 minutes for a storeroom rack once you know the sequence. A full-height 200cm warehouse bay is closer to an hour for two people.
Watch it done first
The whole build, start to finish. If you would rather read it, every stage is photographed below.
What is in the box
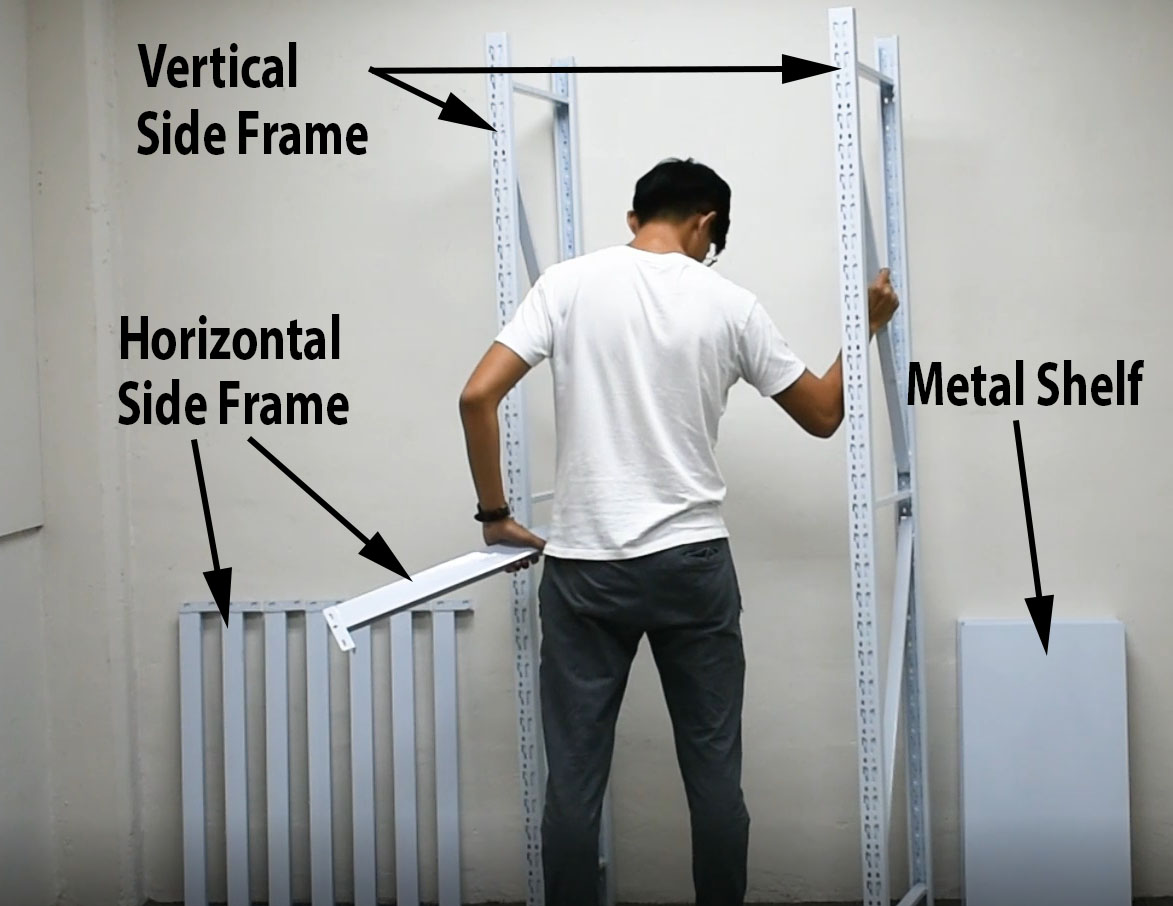
A standard four-shelf rack arrives as three kinds of part:
| Part | Quantity | What it is |
|---|---|---|
| Vertical Side Frame (VSF) | 2 | The two sides. Each is a pair of uprights already welded together with diagonal bracing, so it arrives as one rigid panel rather than loose legs. |
| Horizontal Side Frame (HSF) | 8 | The beams. Two per shelf — one front, one back. |
| Metal shelf panel | 4 | Goes in last. These simply rest on the beams; nothing clips or screws. |
The arithmetic that matters: beams ÷ 2 = shelves. Eight beams give you four shelves, ten give you five. If you ordered extra levels, you should have two extra beams and one extra panel for each.
Before you start
- Build it in the room it will live in. An assembled rack will not fit through a storeroom or household shelter door. Carry the parts in and build in place.
- Clear the floor and lay the parts out: side frames against a wall, beams in one stack, panels in another.
- Decide your shelf heights roughly now. You can change them later, but it is far quicker to set them once than to lift a loaded shelf.
Step 1: Stand the two side frames
Lean both Vertical Side Frames against the wall, roughly a rack's depth apart and facing each other, with the punched slots on the inside. Leaning them is the point — it frees both your hands for the first beam, and a bare side frame will not stand up on its own.
If you are working alone, lean one frame and hold the second with your knee as you start the first beam. With two people, one holds while the other fits.
Step 2: Lock the first pair of beams at the bottom
Take one beam and look at its end. There is a small flat bracket with hooked tabs punched into it. Those tabs go into the slots running down the inside face of the upright.
Line the tabs up with the slots, push the beam in, then push down. The tabs drop and seat, and the joint locks. You will feel it go — there is a positive click as the hooks catch.
Do the same beam at the same height on the opposite side frame. The moment one beam is in at each side, the rack stands on its own and you can let go.
Both ends must be in the same slot, counting from the floor. This is the one mistake worth avoiding: count the slots on each upright rather than eyeballing it. A beam one slot out will still go in, and the whole rack will sit a few millimetres skewed from then on.

Step 3: Fit the remaining beams at the heights you want
Work upwards. Fit each pair of beams at the height you chose, front and back, counting slots on both uprights every time.
Fit the top pair last and leave them until the end — they brace the top of the rack and the frame is noticeably more stable once they are in.
Working out the spacing is the only part of this job that needs any thought:
- Suitcases and bulky bags want roughly 60–70cm of clear height, and that bay is usually best at the bottom.
- Standard storage boxes want 35–40cm.
- Small items, tools and cleaning supplies are comfortable at 25–30cm.
- Measure your tallest item before you commit to the bottom shelf height. It is the one that is awkward to change later, because everything above it has to move too.
Because the side frames are already braced, you can leave the bottom bay completely open — no shelf panel at all — for luggage, a drying rack or a bicycle, and still have a rigid rack. That is not true of racks built from four separate legs, where the lower shelves are holding the structure square.

Step 4: Drop in the shelf panels
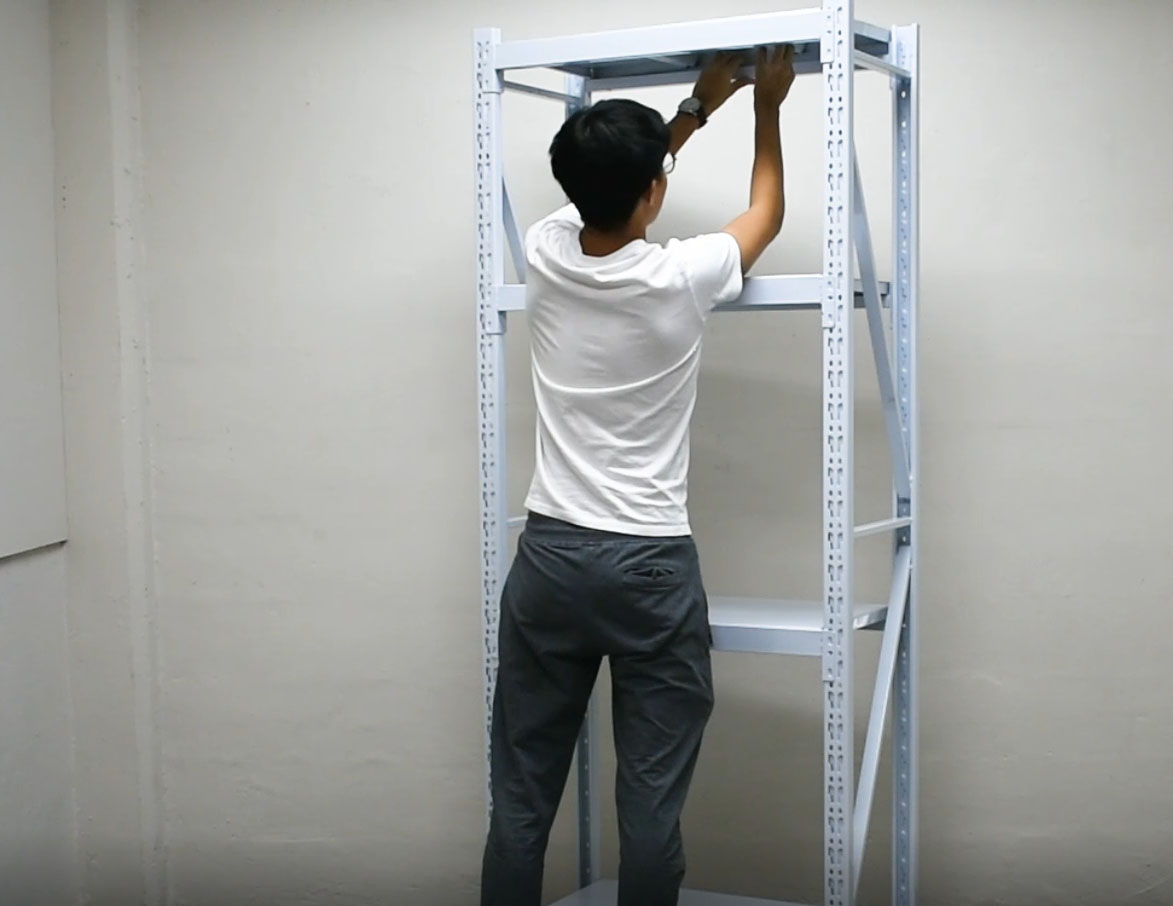
Lay each panel onto its pair of beams. They rest on top and locate themselves — there is nothing to fix, clip or tighten.
Put the lowest panel in first and work up, so you are never reaching over a panel you have already placed. Press down along each edge once it is seated; a panel sitting proud on one side usually means a beam is a slot out, which is far easier to correct now than when the shelf is loaded.
That is the rack built.
If something is not going together
Three things account for nearly every assembly problem, and all three are quick to fix.
A beam will not seat. The tabs are in the slots but it will not drop. Almost always the beam is upside down — the hooks only engage one way round. Turn it over and try again before forcing anything.
The rack rocks slightly. Check the floor before you blame the rack. Singapore floor tiles are rarely dead level, and a 2m rack amplifies a small difference at the base. Shim the low foot with a thin pad; the rubber feet supplied will take up a millimetre or two on their own.
The frame looks skewed. A beam is one slot out somewhere. Work along each level counting slots from the floor on both uprights — it is quicker than it sounds, and it is always this.
Changing it later
The thing people most often do not realise they can do: the shelf heights are not permanent. To move a level, take the panel off, lift the two beams out of their slots, and refit them where you want. It takes a minute, needs no tools, and the rack is as strong afterwards as it was before.
The same applies to moving house. The rack comes apart in the reverse order — panels, beams, side frames — and goes flat in a car. Our guide to boltless rack self-collection shows what fits in which vehicle, if you would rather collect than have it delivered.
Before you buy
Everything above assumes a rack built the way ours are: Z-braced side frames that arrive rigid, and deep butterfly slots that hold a beam whether the shelf is loaded or not. On racks built from four separate legs with shallow keyhole slots, the assembly is slower and the result is less forgiving — our guide to choosing a storeroom or bomb shelter rack compares both side by side.
If you have not measured the room yet, start with the storeroom measuring guide — the door opening decides what will fit more often than the wall does. Then pick a size from the storeroom rack range.


